Thursday, March 31, 2011

lemon raspberry loaf

my favorite thing about spring is... the lemon raspberry loaf at starbucks!
ok, maybe it's not my FAVORITE thing about spring, but it is definitely one of my top 10 things.

so i tried making it once last year, and it was ok.. but not great. so i'm trying another recipe that I found.

lemon raspberry loaf with lemon cream cheese frosting

1 3/4 cups flour
1 tsp baking powder
1/2 tsp salt
1 large lemon
1/2 cup butter
1 cup sugar
2 eggs
1 tsp vanilla
2/3 cup milk

preheat oven to 350 degrees. oil a loaf pan.
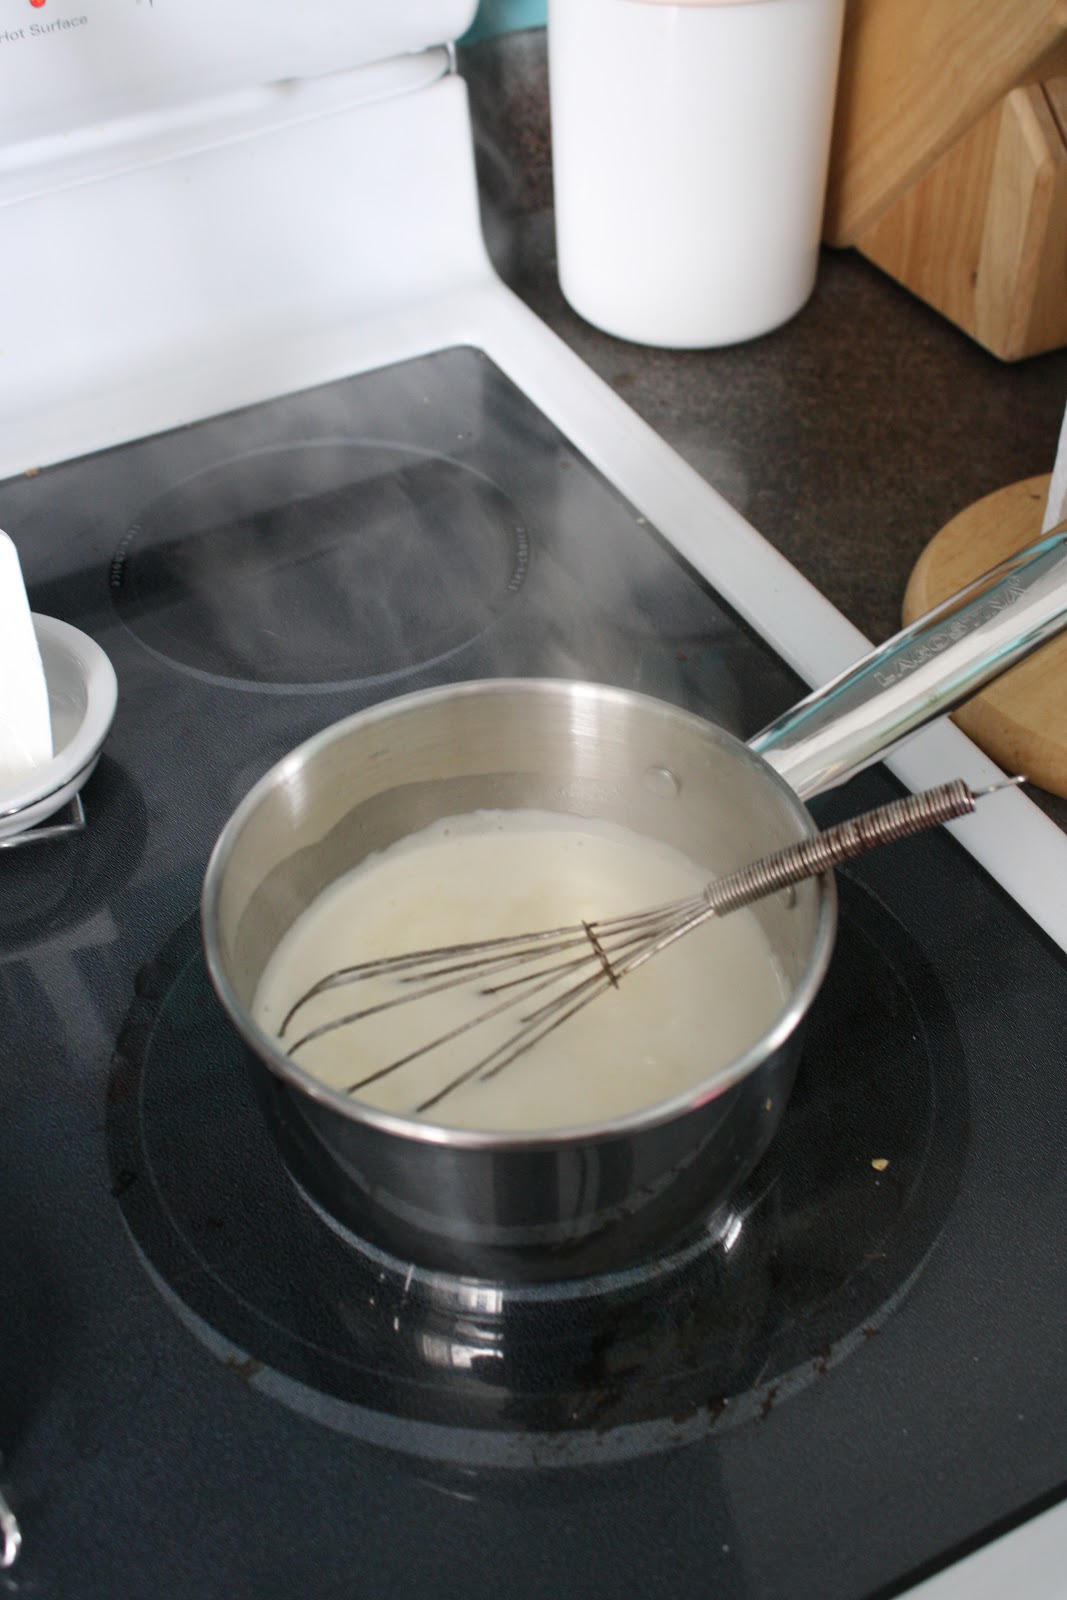
in a bowl, use a fork to stir flour with baking powder and salt. Stir in grated peel of half a lemon. In a separate bowl, using an electric mixer on medium, beat butter. Gradually beat in sugar. Beat for 2 minutes. Beat in eggs, vanilla and milk. Using a wooden spoon, stir in flour mixture just until batter is moist. Don't overmix.

Heat 1/2 cup Raspberry jam in the microwave, 10 seconds at a time, stirring inbetween each time. you want the jam to be soft, but not liquidy.

Pour 1/3 of the batter into the loaf pan. Spread 1/2 of the jam mixture over the batter. Swirl lightly with a knife. Pour 1/3 batter over the jam. Repeat with the rest of the jam, and top with the last third of the batter.

Bake at 350 for 50-65 minutes or until golden and a skewer inserted into centre of loaf comes out clean. The top of the loaf will likely crack, thats ok.

Lemon Cream Cheese Frosting

1 8 ounce package of cream cheese, softened
1/4 cup butter
Squeeze the whole lemon into the bowl
2 tsp lemon zest
1 tsp vanilla
5 cups icing sugar

Beat all ingredients together (except sugar) till smooth & fluffy. Add sugar slowly. Beat until creamy. Add sugar or juice as needed, to reach desired consistency.

Spread frosting over loaf once it has cooled.

enjoy!

all the ingredients together

fresh from the oven

all iced up!

yogurt

that's right! homemade yogurt!!

yogurt is one of those things that i never thought about making on my own, until my friend emily told me that she had made some.

so, i took it on. first attempt - not well enough insultated.. so i had runny stringy weird smelling milk. ick.

second attempt - better prepared. and.. SUCCESS.

so here you go:

you need either 2% or 3% milk
a large pot
mason jars
tea towels
heating pad (or hot water bottle)
cooler (not absolutely necessary, but i think it was a big help)

Pour the milk into the mason jars so that you know exactly how much milk you will need. Empty the jars into a large pot. Bring it to boiling (as soon as it foams up, you turn it off). make sure you are stirring constantly so that it doesn't burn on the bottom

pour the hot milk back into the mason jars and cover with lids.

put the pot you were using into the sink, and put the jars inside of the pot. then slowly add coolish water to the pot - you are wanting to cool down the milk, but you don't want the jar to crack from being really hot to really cold. as the jar gets used to the cool water you can make it colder. let the jar sit in the cool water for about 5 minutes
then test to see if the milk is cool enough, you want to be able to stick your finger in the milk for 10 seconds without it burning, still hot but not really hot as you don't want to kill the bacteria. when you are checking the temperature be sure to stir the milk to be sure that it's evenly cooled.
when its cool enough, put in about a tablespoon and a half of yogurt (plain yogurt, don't use any flavored kind). I put that amount into each jar that i had of milk. Mix it in really well so the bacteria are spread well throughout the milk.

then wrap the jars tightly in teatowels (one towel each) and place in a cooler. Put a heating pad on top and close the lid.  make sure all the jars are well covered and warm and that no draft is able to get in.

let them sit undisturbed for 5 hours and ta da! yogurt.

you can stick a spoon into the jar at that point to see if it is set enough, and you can leave it longer if you'd like. just don't leave it too long!!

my friend emily told me not to stir it, as it takes away from the thickness of the yogurt, but i think that is really a trial and error thing, and more about personal preference! i stirred up one jar so far, so I'll see if i dislike that in the end.

for those of you who aren't used to eating plain yogurt.. you can add fruit to it each time you eat it. or mix some sugar with a small amount of vanilla and stir it in just before you eat it. i like to cut up apples & pour the yogurt on top. then sprinkle with cinnamon and brown sugar. mmmm
all ingredients are ready

measure the milk into the mason jars

once it foams up like this take it off the heat

cool down the milk like so (but with the lids on!)

add the yogurt "starter" to the milk & stir well

one tea towel per jar

all snuggled up

leave it alone for 5 full hours at least. no peeking!

all done & ready to eat with apples, brown sugar & cinnamon

Friday, March 25, 2011

krista's mom's super duper delicious chocolate chip cookies

my friend Krista posted a picture of these cookies on her blog the other day, so i asked for the recipe & now i have some freshly baked cookies to take to my girls night with leah & amanda. tasty

here is the recipe:

1 C Margarine
1 C White sugar
1/2 C Brown sugar
2 Eggs
2 tsp. Vanilla
2 C Flour
1 tsp. Baking Soda
1 tsp. Salt
1/2 pkg. Choclate Chips

* Cream together margarine and sugars
* Beat in eggs and vanilla
*Add flour, soda, salt and chocolate chips
(a tip from Krista - the best cookies are made when the dough is more stiff than wet. I usually add a bit more flour to make it the right consistency. Also, it helps if the margarine is soft.)
* Drop by spoonful onto cookie sheet
* Bake at 375 for 8-10 minutes

Try not to eat them all in one sitting.

delicious!

crepes

i am definitely a breakfast for supper kind of girl
when i can't think of something to make, or don't feel like making something, i normally choose to have cereal. if i ask michael to make supper, it's normally crepes that come out of the kitchen. good thing he's so good at making them :)

my grandpa klassen was also an excellent crepe maker. although, we called them german pancakes. and we only put corn syrup on them. then he'd show us how to hook one prong of our fork into the crepe & roll it perfectly.

when i met the thiessens, the simplicity of the corn syrup covered crepe was blown out of the water! (in a good way of course) crepes with the thiessens is more of an 'event' than a meal. there are so many options, that you can feel quite sick at the end because you want to try everything.

when it came to our wedding planning, we knew that we wanted the wedding to be uniquely michael&ashley - so we decided to have crepes. i remember the look on the caterers face when i started explaining the meal to him. he showed me this teeny tiny bowl that he would use for whipped cream & i said 'no no no, you obviously have never met my husband' and then he took me to his kitchen so i could find the right sized bowl.

the crepes themselves are the easy part. it's the toppings that really make the event, the event!

i also recommend getting a good quality crepe pan (about 25 bucks at home outfitters) it can really help.

crepes

2 cups flour
2 cups milk
4 eggs
1/2 tsp salt

mix ingredients together with a whisk so that there are no lumps. heat pan over medium-heat. pour just enough batter to make a nice layer over the entire pan & tilt the pan as needed so that you get the batter covering the pan evenly. when it starts to brown on the pan side, loosen the edges with a spatula and flip the crepe over completely (this is where i'm terrible & michael is great with the flipping). cook the other side till it's browned (it won't get as golden as the first side) then put onto a dinner plate & make the next one. we stack all of the crepes directly on top of one another & cover them with a tea towel till we're ready to eat. ** for whatever reason, we think that the batter is easier to work with if left in the fridge over night, or for an hour or two.

suggested toppings:
whip cream
maple syrup
nutella
peanut butter
corn syrup
vanilla sauce (or a thickened pudding)
bananas
peaches
plain yogurt (with a bit of brown sugar & cinnamon)
strawberries

mike's mom also makes a meat sauce (almost like a stroganoff) to make a savoury crepe. the batter itself is a savoury crepe because of the salt & no sugar, so you can go either sweet or savoury.

my personal favorite? a thin line of nutella. half of a banana sliced up. a line of whip cream. roll it up & drizzle with maple syrup. mmm tasty.

**just an fyi - i have tried to make it easier to comment by removing the word verification step. so feel free to comment as you like!

stack them like so

this picture is from google images. i can't claim the beautiful presentation of such a tasty looking crepe! but mine do always look that good, trust me ;)

this picture speaks for itself.

Tuesday, March 22, 2011

sea salt caramels

i love caramel.
one day my friends facebook status was about eating a whole batch of salted caramels. so obviously, i asked her for the recipe. a few months later i finally decided to attempt & conquer the recipe. and trust me, it is TASTY.

sea salt caramels

1 cup heavy cream
5 tablespoons butter, cut into pieces
1 teaspoon sea salt
1 1/2 cups white sugar
1/4 cup light corn syrup
1/4 cup water
parchment paper
oil/candy (deep-fat) thermometer

line the bottom & sides of an 8-inch square baking pan with parchment paper, then lightly oil parchment.
in one pot, bring cream, butter & sea salt to a boil, then remove from heat & set aside.
in a larger pot, boil sugar, corn syrup and water, stirring until sugar is dissolved. Boil, without stirring, but gently swirling pot, until mixture is a light golden caramel color. carefully stir in cream mixture (mixture will bubble up) and lower heat slightly, stirring frequently, until caramel registers 248 degrees Fahrenheit on thermometer, 10 to 15 minutes.
pour into baking pan and sprinkle with additional sea salt. let cool for 2 hours. cut into 1 inch pieces & enjoy. *for an added "candy" effect, wrap each piece of caramel in a piece of wax paper, twisting two ends to close.

**i think i may have kept my caramel on the heat for a little too long as I was unable to cut the caramel into pieces. i used a hammer to break it up. the pieces are hard but soften up as you keep them in your mouth.
all my ingredients ready to go

boiling the sugar, corn syrup & water mixture

boiling the cream, salt & butter mixture

the mixture bubbles up when the two parts are added together

let it bubble like this (stirring a lot) until you reach the right temperature
pour it into the pan & allow to cool

break up the pieces & enjoy!

Monday, March 21, 2011

topped-up fiesta dip

it's been a chilly rainy weekend.
our caregroup was coming over yesterday so i wanted to serve something delicious & warm. it's wonderful to eat something tasty & warm on a chilly day.

so i decided to try this new (to me) bean dip recipe. and it was a hit.
very simple. very quick. very tasty.

topped-up fiesta dip

1 can (398 ml) Refried Beans
2 cups sour cream
1 cup chunky salsa
1 pouch taco seasoning mix
1 1/2 cups shredded cheddar cheese

Mix all ingredients (except cheese) together in a bowl. pour into a oven safe dish (like a pie plate or a shallow hot dip dish). warm up in the oven - i put mine in the oven for 30 minutes at 350 degrees. you could put it at a higher temperature for less time, or a lower temperature for longer. keep your eye on it so it doesn't burn/crust around the edges. i mixed it with a spoon every 10 minutes or so. once it is warmed through, top with cheese & put back in the oven until the cheese is completely melted. serve hot with taco chips.

here's a picture, it kinda looks gross but it's all about the flavor! this is pre-cheese.

enjoy! it's sure to be a hit.

Wednesday, March 16, 2011

chocolate-walnut banana bread

i get an email from the chatelaine website every day. a little much to be honest, but every now & then it sends me a wonderful recipe. today the delightful sound of "chocolate-walnut banana bread" woo-ed me. hopefully it tastes as good as it sounds!

here's the recipe...

chocolate-walnut banana bread

3 large, very ripe bananas
1 cup flour
1 cup whole-wheat flour
2 tbsp ground flax seed
1 tsp baking soda
1/2 tsp salt
1/2 cup unsalted butter, at room temperature
3/4 cup packed brown sugar
2 eggs
2 tbsp rum
2 tsp vanilla
1/2 cup semi-sweet chocolate chips
1/2 cup chopped walnuts

Preheat oven to 350 degrees. Lightly oil or spray a 9x5 inch loaf pan.
Mash bananas in a medium bowl (they should measure about 1 1/2 cups).
Stir both flours with ground flax seed, baking soda & salt in a medium bowl.
Beat butter with sugar in a large bowl until combined, then beat in eggs, rum and vanilla. Stir in bananas. Using a wooden spoon, stir in flour mixture just until combined. Do not overmix. Gently fold in chocolate chips & walnuts. Scrape batter into prepared pan. Smooth top.

Bake in centre of oven until a toothpick inserted into the centre of the load comes out clean, 50 to 65 minutes. Cover loosely with foil for the last 15 minutes if top browns too quickly. Remove pan to a rack to cool for 10 minutes. Run a knife around the inside of the pan to loosen loaf. 

Carefully turn out loaf, then turn top-side up on a rack. Bread will keep well at room temperature up to 3 days or frozen up to 2 months.

Tuesday, March 15, 2011

fleish pereshki

one of my favorite things that my grandma baked were "fleish pereshki", meat buns "fleishers" as they were affectionately called. grandma was famous for her buns and her fleish pereshki. when grandma passed away, i was very sad that i had never made them with her and that i never learned her secrets! but i do have the very special gift of her recipe box and i love to try her recipes... trying to be a baker just like her!!

so today's undertaking was fleish pereshki, which also included attempting her buns.
well, a few hours & 4 1/2 dozen buns later... success! both of my mom's & my auntie ruth stopped by for a bun, and i sent some home for my dad & for josh&leah. michael has eaten a good handful already.. they aren't as perfect as grandma's, but they were a pretty good first start if i can say so myself!

give it a shot. they're worth the effort.

buns:

dissolve 2 tbsp yeast (not instant) ** with 1 cup warm water & 1 tsp sugar. let sit for about 10-15 minutes.
**if you use instant (i did) then only use 1 1/2 tbsp yeast, and don't dissolve it. just sprinkle it when you add the flour.

add 3 cups warm water, 2/3 cup oil, 1 tbsp salt, 3 eggs & 2/3 cup sugar (or less). Add about 7-8 cups (i used 8) flour & knead until the dough reaches the correct consistency.

there are no other formal instructions from grandma - but auntie ruth passed on the following directions from when she made them with grandma: let the bun dough rise till it's doubled in bulk, about 1 1/2 - 2 hours (let the bowl sit in a sink of hot water to speed up the process). *form the buns and place on a greased sheet, let rise again for 3/4 hour and bake at 350 degrees till golden brown, approximately 20 minutes.

*when making fleish pereshki follow this recipe from this point on.

fleish pereshki

filling: 2 lbs meat (my grandma used to use a low quality roast, and then put it through a meat grinder. i used ground beef)
1 onion, chopped
1 cup of beef broth
salt

brown the meat. add the onions & fry till browned. add broth & salt. let simmer for a few minutes, then let it cool. put meat into a blender (i use the magic bullet) until quite fine. (my own personal opinion: the meat looks really gross at this point. just keep going, it'll be worth it!)
flatten small pieces of dough and put a spoonful of meat in, close them up, place on a greased sheet and let rise for approximately 1 1/2 hours. bake at 350 degrees for 15-20 minutes.

invite your friends over for a bun. this recipe makes 4 1/2 dozen large buns.


all formed up & waiting for the oven

like i said, the meat looks gross. similar to cat food, just keep going & it will look less gross!
make sure you have lots of space for pans. there are 6 pans in this picture.. can you find them all?

done! delicious.

and for my sister leah, as per her request for some genuine GERMAN in this blog post: Fleisch Brötchen sind es wert, all die Arbeit und schmeckt köstlich. nie jah!

hamburger soup

isn't it so wonderfully satisfying to make a huge pot of soup, or chili or any giant meal?

i find it so fun to be able to make a large portion of something, so we can enjoy it all week or share it around the table with friends or family.

i decided this week to try a recipe that i found in my grandma's box of recipes.
i had to make some small modifications because i didn't have everything in my kitchen.. but it ended up being sooooo tasty.

hamburger soup

1 1/2 pounds of ground beef
1 medium onion chopped
2 cups water
3 cans of beef broth (or one 900ml carton)
2 - 284 ml can tomato soup
4 carrots chopped
1 can red kidney beans
1 can peas
1 bay leaf
3 stalks celery chopped
parsley (i didn't have this)
1/2 tsp thyme
pepper to taste
1 pkg dry onion soup mix (liptons)
8 tbsp barley (i didn't have this, so i used macaroni instead)

brown the ground beef & add the onion, fry up till the onions are just browned. put the rest of the ingredients (except macaroni) into a large pot over medium heat. add the beef & onions once browned. cover & lower the heat so that the soup is just simmering.
in a separate pot, fill with water & bring to a boil. pour in macaroni and cook for 5 minutes, so they are slightly undercooked. drain & add to the rest of the soup. let simmer for 2 hours, or all day. enjoy!

simmering

ready to eat!

Tuesday, March 8, 2011

ashley & michael's go to meal

so this isn't as much a recipe as it is a suggestion of a delicious, healthy, quick, go to meal!

michael & i are crazy about peanut sauce. we love it. it's so tasty & zippy.  so here is our go to, peanuty, delicious stirfry

Peanut Stir Fry

ingredients:

brocoli
snap peas
peppers (our favorites are red, yellow & orange)
onion
* i have also used: black beans, chick peas, corn, cauliflower - just didn't use them today
beef (i buy the "stir fry strips" - it's so much easier & fast!) or you can use chicken
peanut stir fry sauce (i buy the compliments brand from Sobeys)
rice noodles (also from sobeys, in the ethnic aisle)

directions:
stir fry your meat with a small amount of oil over medium-high heat.
chop up vegetables, slice the peppers julienne & then half way so they are bite size
put all the vegetables into the pan with the meat once it's cooked through
at the same time, boil a kettle of water. place the rice noodles in a sieve inside a bowl. once the kettle has boiled, pour the water over the noodles so that it sits in the water in the bowl. it will take about 7 minutes for them to cook all the way through.
pour the sauce over the vegetable/meat combo & stir.
drain the noodles - at this point i use scissors to cut the noodles - as rice noodles can often be sticky if they are too long
mix the noodles into the meat/vegetables & you're ready to eat.
*some nice salted peanuts tossed in would really spice things up!!

enjoy.

not a great picture - but i was too hungry to stop & take an actual picture!!

Wednesday, March 2, 2011

cinnamon raisin bread

mmm doesn't that just sound delicious??

i love the smell of cinnamon, and i love the smell of bread baking in the house

this afternoon i felt quite chilled, and i thought that some nice warm fresh bread would hit the spot. also, i remembered that i had raisins so... cinnamon raisin bread was an obvious choice!

again, i use my breadmaker, so i don't really have steps for making it without the breadmaker. i know you alternate kneading & rising, and then with baking, the whole process takes 2 hours & 20 minutes.

so hopefully you have a breadmaker & you can use this recipe!

cinnamon raisin bread

1 cup water
1 tablespoon butter or margarine
2 1/4 cups flour
1 1/2 tablespoons sugar
1 teaspoon salt
3/4 teaspoon ground cinnamon
1 1/2 teaspoons active dry yeast
1/2 cup raisins *

Put ingredients into the breadmaker in the order listed above, except for the raisins. Make a well in the flour & put the yeast in the well. Start your breadmaker. Set a separate timer for 10 minutes. *At the 10 minute mark, pour in the raisins a little at a time. Use a rubber spatula to press on the dough as it is being kneaded so that it will pick up the raisins & incorporate them properly. then leave it be. 2 hours & 10 minutes later... voila! warm tasty bread.

fresh from the oven